
Draft a Flutter Sleeve for the Ellie & Mac Tres Belle Dress

I am very late to the party when it comes to self-drafting pattern pieces to modify the clothes I make. I learned to fit first, and recently I did my first true pattern hack but I was now years old when I first experienced the sewing joy that a self-drafted sleeve brings.
Allow me to explain.
Taking the existing sleeve from a pattern and using it as a basis for your own self-drafted version means that your sleeve will fit perfectly into your armscye first time. It will behave as if it were always meant to be that way.
You will be able to choose exactly how you want your sleeve to look. And this was key for me. I was going to a wedding and I wanted my sleeves to look elegant, to cover my bicep, and to land at the narrowest part of my upper arm. And because I don’t typically wear fancy sleeves, I wanted them to lie close to my body line. I am not a fan of the short, perky flutter that sticks out and makes me feel like I have wings!
Preparing the pattern pieces
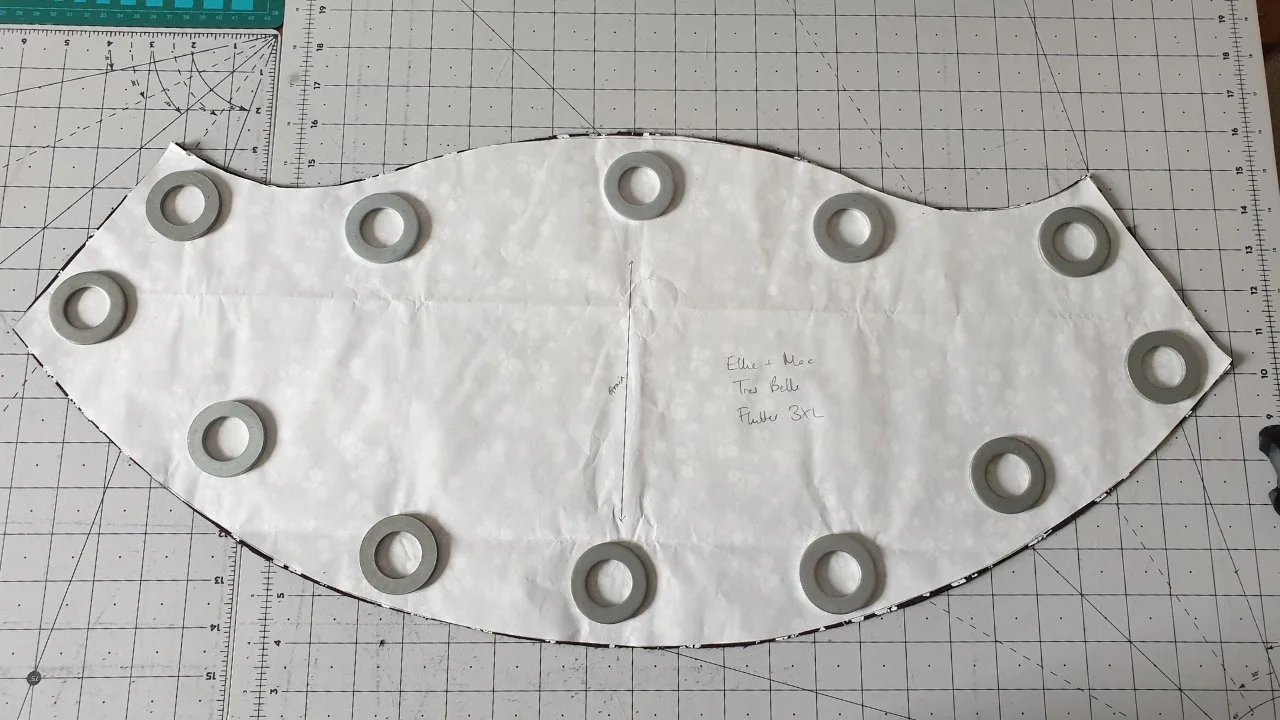
For this hack you will need the Ellie & Mac Tres Belle Dress (or the sleeved dress of your choice). You will need the whole pattern, but for this tutorial I will focus on the sleeve. I used the short sleeve pattern piece for this hack. Choose your size and print it out.
Note that if you have adjusted your sleeve in any way, with a full bicep adjustment or adding length etc, that you will need to use your adjusted sleeve for this project. So trace off a copy, and put your original safely away.
Other items you will need:
Tracing paper - I used this gridded paper
Sticky tape – I prefer Scotch Magic Tape
French Curve – optional but you will get a better result
A firm surface on which to work
Sharp pencil
Paper scissors
Pattern weights
Drafting the sleeve
The goal here is to add volume to the sleeve in increasing amounts from the shoulder cap down to the hem, adding enough on the outer arm for a full and elegant flutter, while controlling the fabric under the arm. This is done by adding wedges of volume incrementally across the sleeve.
Begin by determining the length of your finished sleeve. I used a rolled hem on my sleeve to match the rolled hem on the skirt of the dress, so I only needed ¼” for my hem. I added another 1” to the sleeve length because I wanted it to land on the narrowest part of my upper arm, just above my elbow.
TIP: The finished sleeve hem will have a distinct curve, so take this into consideration when deciding on which hem treatment to use.
Now, you can use the cut-on-fold pattern piece as it is, but I prefer to work on a whole sleeve so I can get a feel for exactly how much volume I am adding. Trace the other half of the sleeve and tape them in the middle.

It's easier to see how much volume you are adding if you work with a full sleeve piece.
Draw in the seam allowances
Using a sharp pencil and your French Curve draw in the 3/8” seam allowances on the sleeve head and the side seams. These lines will become important later for ensuring that your sleeve head seam remains the correct length.
Next, starting in the centre at the cut-on-fold line, draw vertical lines ¾” apart, stopping about 3” before you get to each side seam. I sew a size 3XL, and I had 8 strips on each side. You can work with fewer, but your flutter may not turn out the same way.
One lesson that I learned as a plus-size sewist self-drafting my own flutter sleeve – most diagrams you find online will assume that you’re working on a much smaller pattern piece. You will likely have far more strips than illustrated. And that’s OK.
Cut your strips carefully, going up to but not through the seam line. Work your way across the entire pattern piece and then turn it round and work back the other way, cutting into the seam allowance just up to the pencil line. You should end up with what looks like a fringe. Lay the pattern piece down on some tracing paper, being careful not to twist it. If any of the hinges break, tape them using a very thin strip of tape so they can still move.
Spread out the sleeve piece
This is where you will begin to add volume to the sleeve. I’m going to give you the exact amounts I moved every strip so you can copy my sleeve exactly if you want to. Start in the centre and mirror the additions on each side.
Centre: 2” (1” either side of the centre line)
1½”
1¼”
1”
1”
1”
¾”
½”
½”
The best way I found to manage this was to draw in a vertical centre line on the tracing paper at the cut-on-fold line, and to arrange the strips evenly either side of this, with the first two strips positioned 1” either side of this line. This line also becomes the grainline for the pattern piece.

Gridded tracing paper makes this stage much easier. Choose a vertical line to be the centre grainline and arrange the strips on either side of it.
Once everything is looking even, tape it down. Then take your pencil and your French Curve and true the hem. The new hem will add tiny wedges to some strips, and remove tiny wedges from others. It should be an even, symmetrical curve.
At the sleeve head, the strips will all overlap slightly but should also form an even symmetrical curve. You can tidy this up if you need to using your French Curve, or you can do that in the next step when you trace out your new pattern piece.
Trace out your new flutter sleeve pattern piece
Make sure that everything is taped down securely and then lay your altered pattern piece down on a flat surface and trace out a fresh copy. I don’t recommend trying to use your altered pattern piece directly for cutting your fabric, as it will be quite fragile and if it gets damaged you will have to go through the whole creation process again. It’s better to use a fresh tracing that will be thinner and easier to pin to the fabric, and be less precious should anything happen to it.
Sew according to instructions
That’s it! You can now take your new flutter sleeve pattern piece and use it exactly as you would use the short sleeve pattern piece when you make your next Tres Belle. The alterations we made are all symmetrical, so there is no need to mark the front and back of the sleeve head. Just be sure to cut 2 mirrored when you come to cutting out your fabric.
Also, because we pivoted the strips out at the seam line and not at the edge of the pattern piece the sleeve head seam length has not changed, so your new sleeve should fit perfectly into the armscye on the bodice.
Share your Tres Belle on social media
I’d love to see your self-drafted flutter sleeves in action, so please use the hashtag #inclusivesewing when you post to Instagram, TikTok, Facebook or Pinterest and give me a wave.